Generative Embroidery with p5.embroider
![]()
This article is the December 19th entry for Processing Advent Calendar 2025.
https://nkymut.github.io/p5-advent-2025/
Table of Contents
- Generative Embroidery with p5.embroider
- Introduction
- p5.embroider Workflow
- Example: Fractal Christmas Tree 2025 Edition
- Conclusion
Previous Advent Calendar Articles
- 2024 Article: Controlling 3D Printers with p5.js
- 2023 Article: Digital Embroidery with p5.svg
- 2022 Article: Physical Computing with p5.js and micro:bit
Introduction
In this article, I’ll introduce how to generatively design embroidery data with p5.js using the p5.embroider library.
In the 2023 p5 Advent Calendar article, I showed how to create digital embroidery by combining p5.js and Ink/Stitch. Now, with p5.embroider developed by the author, you can directly export embroidery data from p5.js drawings.
Let’s dive right in and start generating embroidery data with p5.embroider!
p5.embroider Workflow
Here’s the workflow for designing embroidery data with p5.embroider:
- Load the p5.embroider library
- Create a p5.js canvas in mm units using the mm2px() function
- Set the embroidery preview mode using setDrawMode()
- Create embroidery data between beginRecord() and endRecord()
- Configure stitch spacing and other settings using setStrokeSettings() and setFillSettings()
- Export embroidery data with exportEmbroidery()
- Load the embroidery data into your embroidery machine and stitch
- Fine-tune the embroidery settings based on the machine output results
1. Loading the p5.embroider Library
To use p5.embroider, add the following script tag to your HTML file, just like any other p5.js library:
<!-- Using CDN: -->
<script src="https://unpkg.com/p5.embroider/lib/p5.embroider.js"></script>
<!-- Using GitHub Pages: -->
<script src="https://nkymut.github.io/p5.embroider/lib/p5.embroider.js"></script>
Sample Code
Here’s sample code that generates embroidery data using p5.embroider:
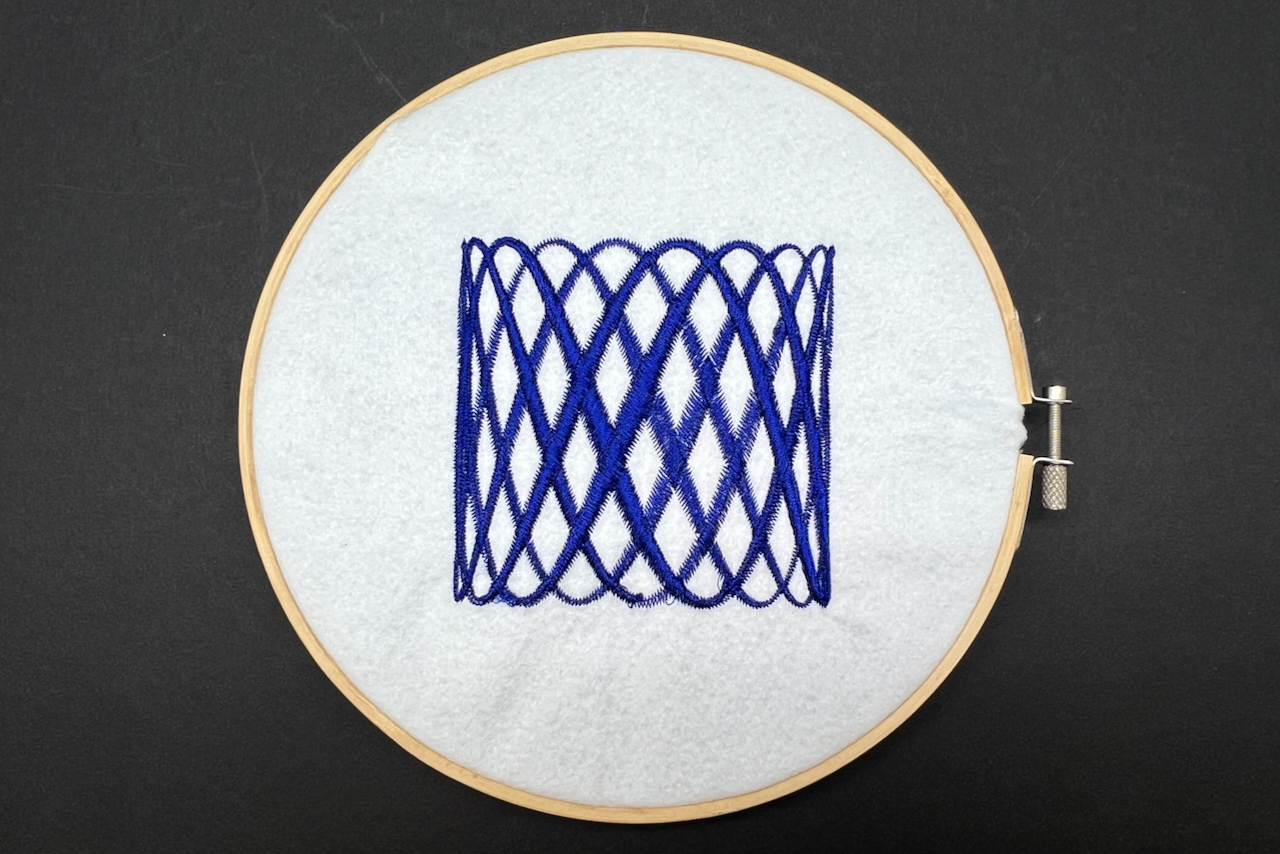
This code embroiders an 80mm x 80mm rectangle with zigzag stitching on a 100mm x 100mm canvas.
  // Create a 100mm x 100mm canvas
  createCanvas(mmToPixel(100), mmToPixel(100));

  background(200);

  setDrawMode("realistic"); // Set the preview mode

  beginRecord(this); // Start creating embroidery data
  translate(10,10); // Translate the drawing origin to (10,10)mm

  setStrokeSettings({ // Configure stroke stitch settings
    stitchLength: 0.5, // Length of each stitch
    stitchWidth: 0.2, // Width of each stitch
    noise: 0.0, // Random coefficient
    strokeInterpolate: true, // Enable stroke interpolation
  });
  stroke(0, 220, 220); // Set the stroke color
  strokeWeight(5); // Set the stroke weight
  setStrokeMode("zigzag"); // Set stroke stitch mode to zigzag

  rect(0, 0, 80, 80); // Draw an 80mm x 80mm rectangle
  trimThread(); // Insert a thread trim command

  endRecord(); // Finish creating embroidery data

  exportEmbroidery("simple.dst"); // Export as TAJIMA DST file
2. Creating the p5.js Canvas
Create the canvas using the createCanvas function as usual.
In p5.embroider, we use mm units instead of pixels for size specifications to create embroidery data at actual size.
Use the mmToPixel() function to specify the canvas size in mm units and convert it to pixels.
The same applies when using the createGraphics() function.
 // Create a 100mm x 100mm canvas
createCanvas(mmToPixel(100), mmToPixel(100));

// Create a 100mm x 100mm p5 graphics instance
let pg = createGraphics(mmToPixel(100), mmToPixel(100));


// Unit conversion functions list

mmToPixel(100); // Convert 100mm to pixels
mm2px(100); // Shorthand

pixelToMm(100); // Convert 100 pixels to mm
px2mm(100); // Shorthand
3. Setting the Preview Mode
setDrawMode("stitch"); // Set embroidery mode to toolpath drawing mode
In addition to p5.js’s drawing methods, p5.embroider supports preview modes that let you visualize the embroidery appearance and sewing machine needle movements.
You can switch between embroidery drawing preview modes using the setDrawMode() function.
Currently, three preview modes are supported:
- “stitch”: Embroidery toolpath drawing mode
- “p5”: p5.js drawing mode
- “realistic”: Embroidery simulation mode
4. Creating Embroidery Data: beginRecord(), endRecord()
Create embroidery data within the range enclosed by beginRecord() and endRecord().
p5.js drawing functions (like ellipse() or rect()) within this range are interpreted as p5.embroider embroidery drawings and rendered according to the previously specified preview mode.
Within this range, drawing function arguments are interpreted in mm units, allowing you to design using actual embroidery dimensions.
You can use familiar p5.js drawing functions and existing p5 sketches with little to no modification for embroidery design. This is one of p5.embroider’s key features.
Note that as of December 2025, the text() function is not supported. Check the following Issue https://github.com/nkymut/p5.embroider/issues/2 for the status of supported functions. PRs are of course very welcome!
Outside the range enclosed by beginRecord() and endRecord(), p5.js drawing functions render to the canvas normally, so you can draw UI, animations, and other graphics. In this case, parameters are interpreted in pixel units, so if you want to draw with the same positional relationship as the embroidery data, use the mmToPixel() function to convert from mm units to pixel units.
beginRecord(this);
    // Create embroidery data
    // Record a circle at x:50mm, y:50mm, width:50mm, height:50mm as embroidery data
    ellipse(50, 50, 50, 50);
endRecord();

// Draw a circle on the canvas at x:50px, y:50px, width:50px, height:50px
ellipse(50, 50, 50, 50);
5. Configuring Embroidery Parameters: setStrokeSettings(), setFillSettings()
Once you’ve created the embroidery drawing, configure the stitch spacing, fill settings, and other parameters.
Configuring Line Stitching: setStrokeSettings()
Just like regular p5.js drawing functions, configure embroidery parameters for stroke() line drawing using the setStrokeSettings() function. The line weight set by p5’s strokeWeight() function becomes the embroidery width (in mm).
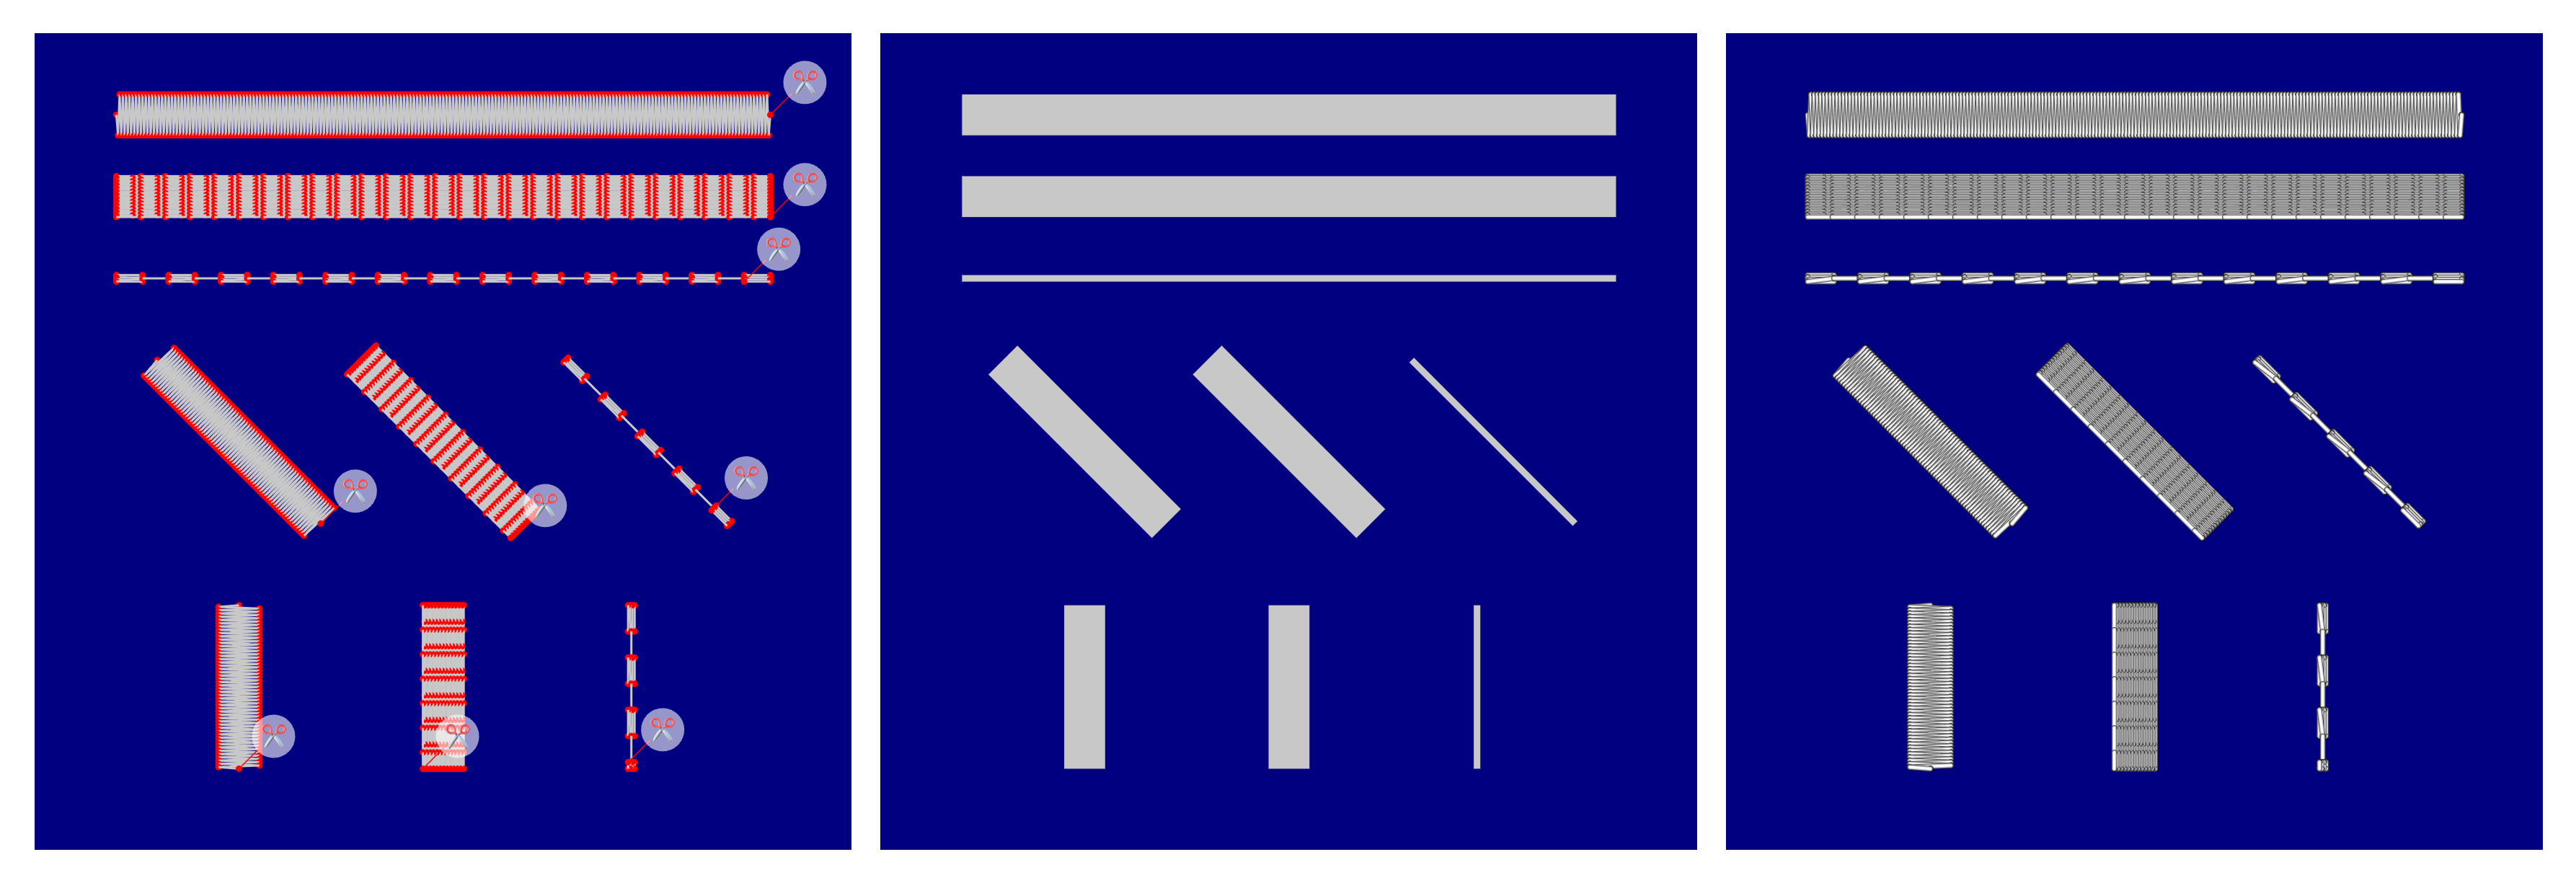
Currently, the following stroke stitch types are supported: straight stitch, zigzag stitch (triangular, rectangular), parallel stitch, and sashiko-style stitch.
stroke(0, 0, 200); // Set the stroke color
strokeWeight(5); // Set the stroke weight to 5mm

// Set the stroke stitch mode to zigzag
// "straight": Straight stitch
// "zigzag"  : Zigzag stitch
// "parallel": Parallel stitch
// "sashiko" : Sashiko-style stitch
setStrokeMode("zigzag");

// Set stroke embroidery parameters
setStrokeSettings({
  stitchLength: 0.5, // Length of each stitch
  stitchWidth: 0.2, // Width of each stitch
  noise: 0.0, // Random coefficient
  strokeInterpolate: true, // Enable stroke interpolation
});


// Shorthand:
// Set minimum, length, and random coefficient for stitches
setStitch(0.1, 0.2, 0);
// Set stitch width
setStitchWidth(0.2);
Configuring Fill Stitching: setFillSettings()
Like stroke settings, after setting the color with the fill() function, you can configure fill embroidery parameters using the setFillSettings function.
Currently supported fill methods include tatami stitch, satin stitch, and spiral stitch.
fill(220, 220, 0); // Set the fill color

// Set fill embroidery parameters
setFillSettings({
  angle: 45, // Set the fill angle
  stitchLength: 0.5, // Length of each stitch
  stitchWidth: 0.2, // Width of each stitch
  rowSpacing: 0.8, // Set the stitch spacing
  resampleNoise: 0.0, // Random coefficient
});

// Set the fill mode
// "tatami": Tatami stitch
// "satin": Satin stitch
// "spiral": Spiral stitch
setFillMode("tatami");
Thread Trimming: trimThread()
Trim threads using the trimThread() function. This function inserts a thread trim command into the embroidery path.
trimThread();
Varying Embroidery Path Width: vertex, vertexWidth
To vary the embroidery width along a path, you can use the z-coordinate of vertex(x,y,z) as the zigzag embroidery width.
You can also use the vertexWidth() function newly added in p5.embroider.
This makes it easy to generate embroidery designs like baseball cap lettering or calligraphy-style embroidery.
setStrokeMode("zigzag");
beginShape();
vertex(10, 10, 1); //1mm width
vertex(30, 10, 5); //5mm width
vertex(50, 10, 8); //8mm width
vertex(70, 10, 5); //5mm width
vertex(90, 10, 1);
endShape();
6. Exporting Embroidery Data: exportEmbroidery()
Finally, calling the exportEmbroidery() function exports the recorded embroidery data as a file.
The drawn embroidery data is recorded as separate embroidery paths for each color specified with stroke() and fill(). This allows you to stitch embroidery paths of the same color together.
If you want to specify the stitching order, you can arrange colors in ascending numerical order to control the embroidery sequence.
Supported export formats include TAJIMA DST files, G-code, SVG, and PNG.
exportEmbroidery("simple.dst"); // Export as TAJIMA DST file
exportEmbroidery("simple.gcode"); // Export as G-code
exportEmbroidery("simple.svg"); // Export as SVG
exportEmbroidery("simple.png"); // Export as PNG
You can load the exported file into an embroidery machine or DIY embroidery machine to stitch your design.
In my environment, TAJIMA DST files loaded successfully on BERNINA, Brother, and E-lucky embroidery machines.
I won’t go into detail here, but there’s also the option of printing embroidery data on paper for hand embroidery or punch needle embroidery.
Example: Fractal Christmas Tree 2025 Edition
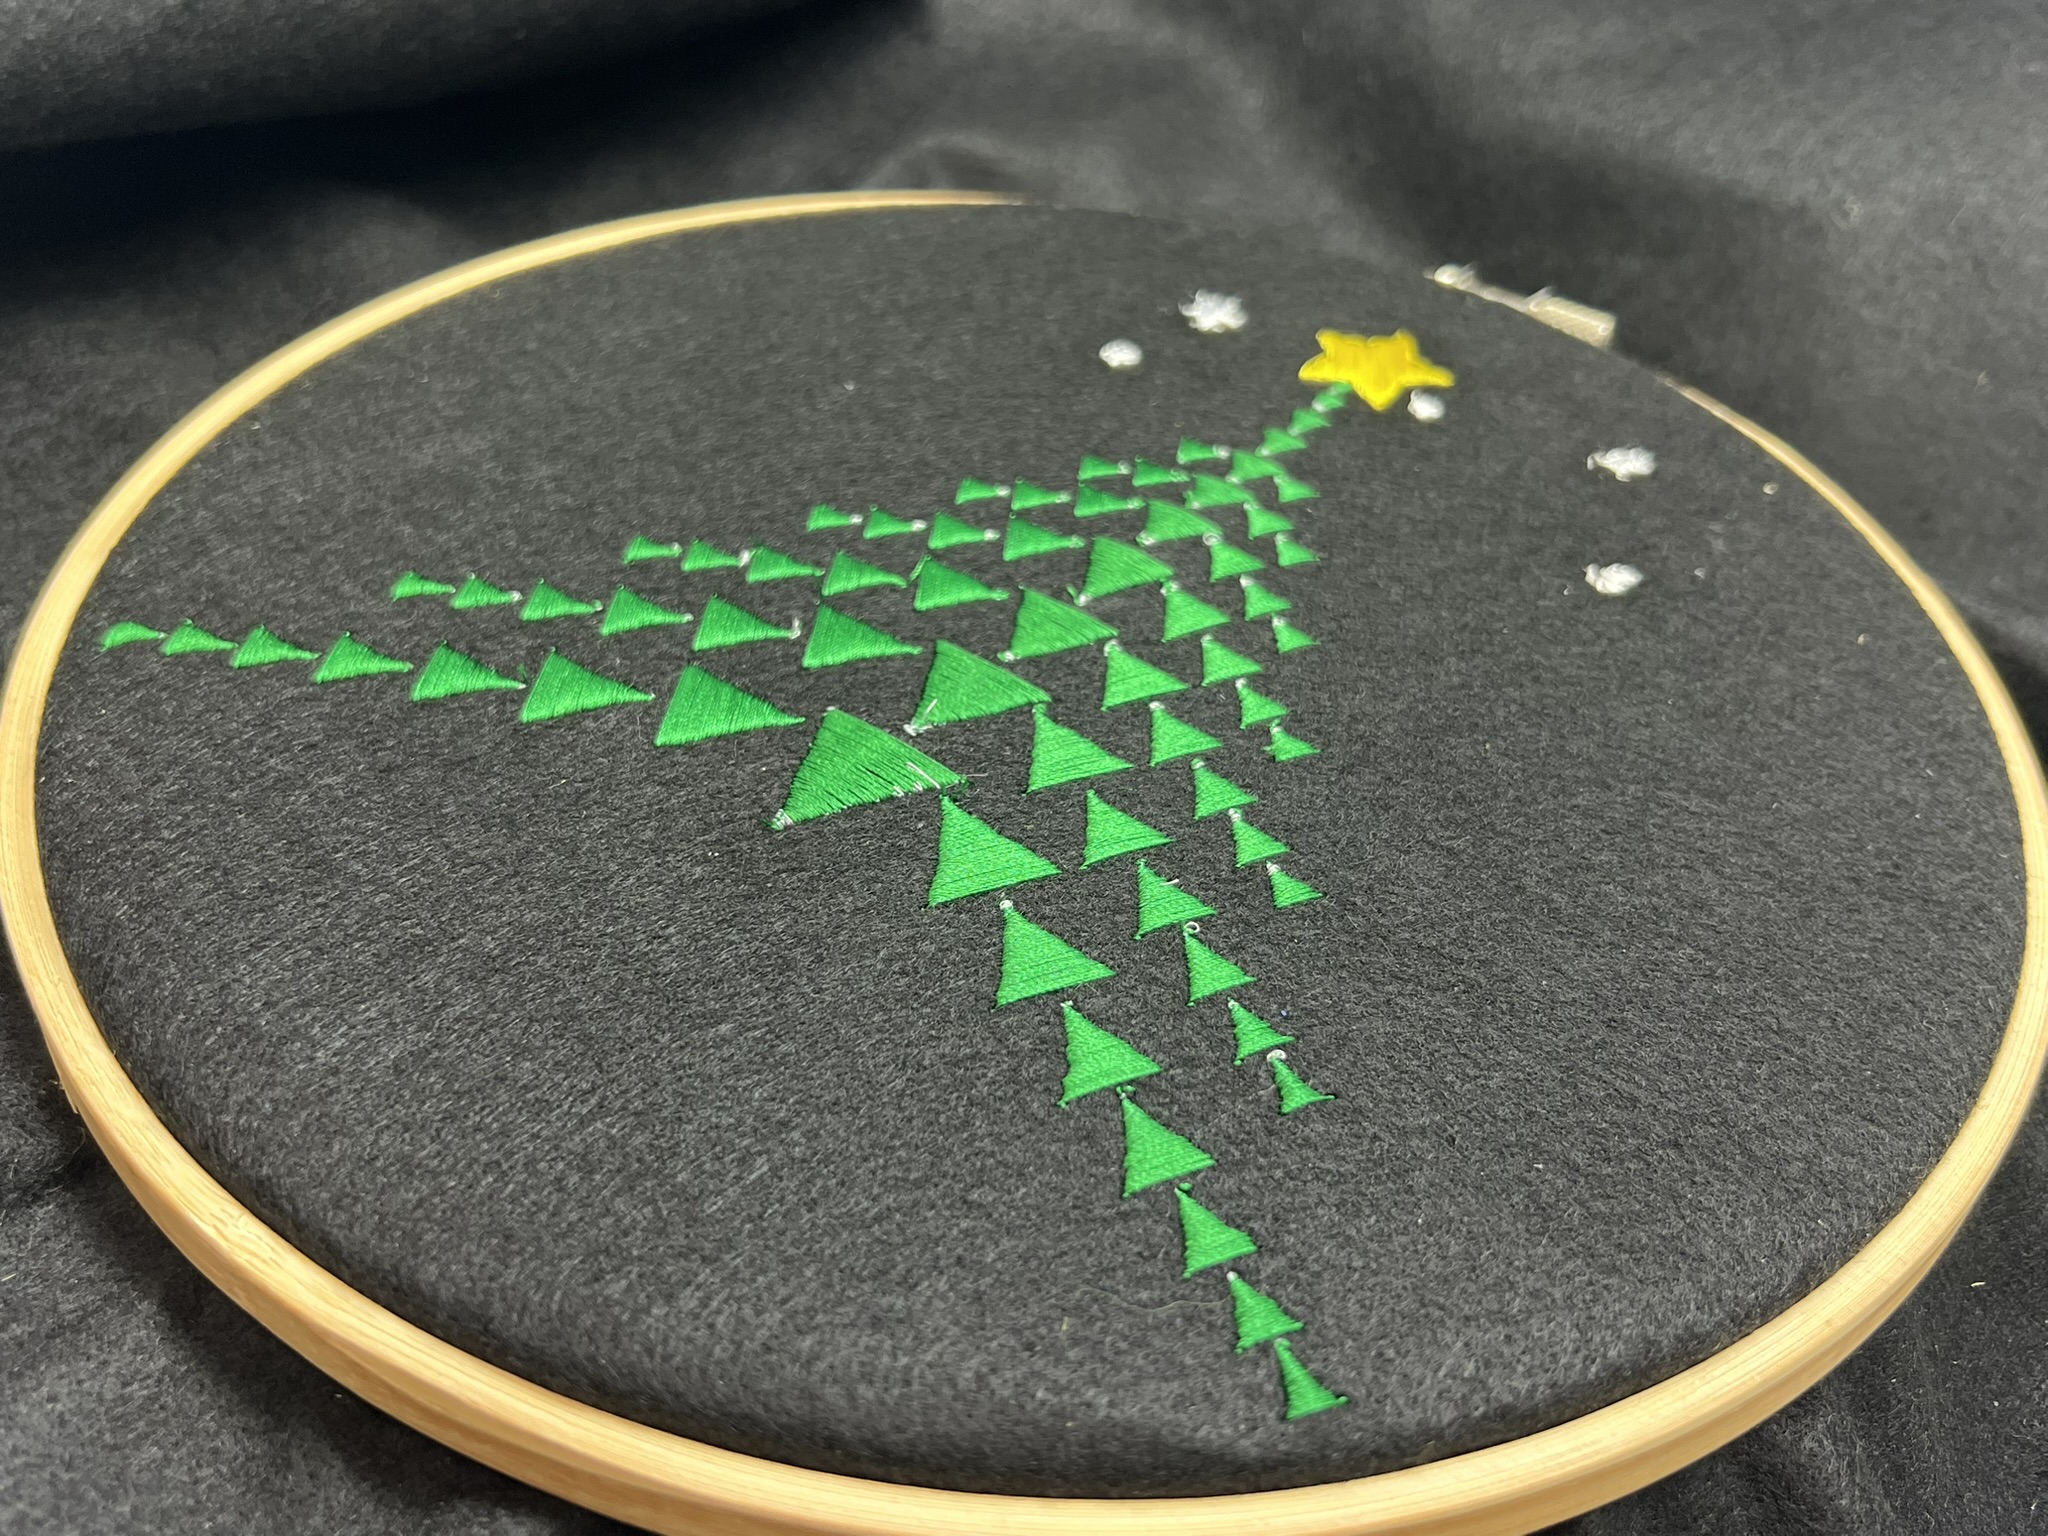
So there you have it—a quick overview of how to create embroidery designs with p5.embroider! As an example, let’s update the fractal Christmas tree from the 2023 Advent Calendar using p5.embroider.
In true 2025 fashion, I gave AI (Sonnet 3.5) the 2023 code along with the following prompt, then did some vibe coding to arrive at this result:
By using p5.embroider's function update the fractal xtree generation code to
1. use vertex(x,y,w) format and branch edge to be narrower and end to be wider yet not to hit with other branches.
2. use satin stitch to the star to make it mo shiney.
3. add white stars around tree using stroke stitches
Conclusion
In this article, I introduced how to generatively design digital embroidery data with p5.js using p5.embroider.
You can find additional samples and documentation at the following URLs:
p5.embroider is still in early alpha stage, so there are many unsupported functions and bugs. If you have feature requests or find bugs, please feel free to report them at the following Issue tracker: https://github.com/nkymut/p5.embroider/issues/
We’re also actively looking for contributors to join the development! Feel free to send PRs as well.
Have a wonderful end of the year!