Controlling 3D Printers with p5.js
This article is the 16th day of Processing Advent Calendar 2024.
Last year’s article (2023): Digital Embroidery with p5.js
The year before last (2022): Physical Computing with p5.js and micro:bit
Overview
This article introduces how to control 3D printers directly from p5.js using the p5.fab library, exploring creative possibilities beyond traditional 3D printing.
Introduction
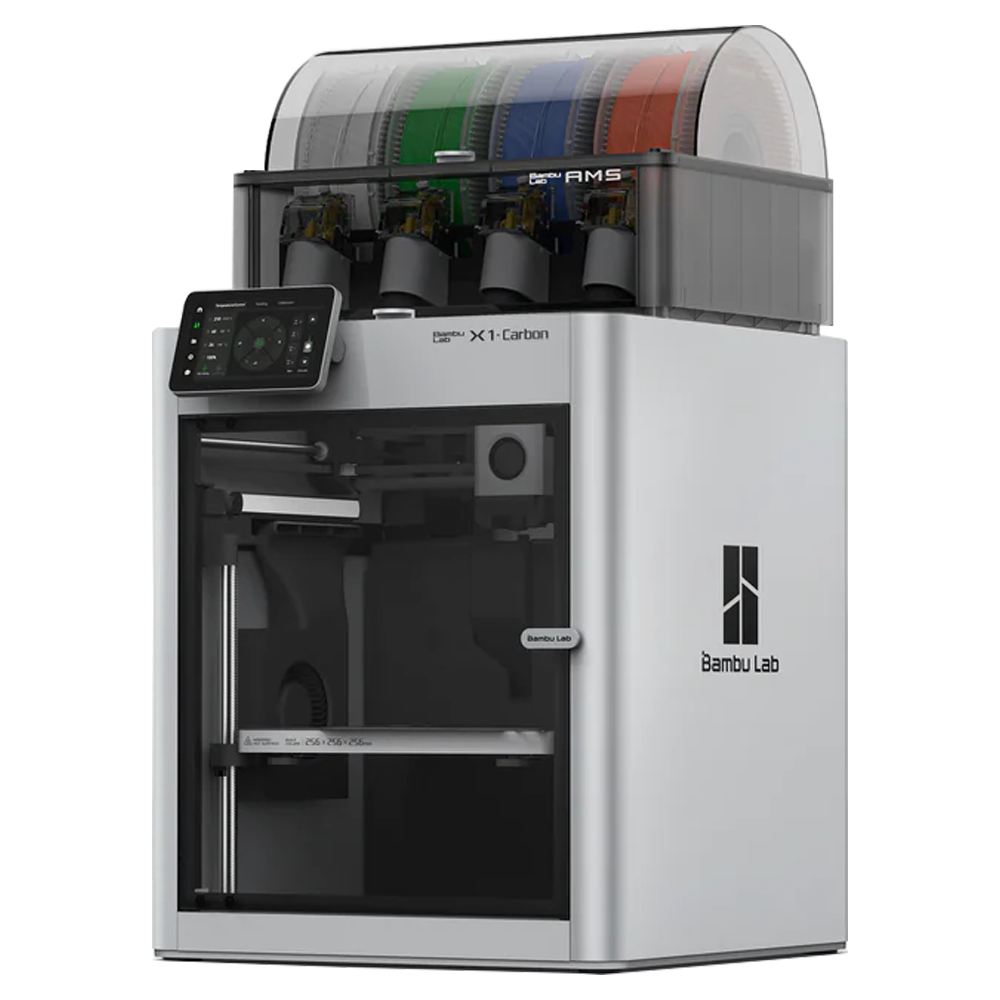
The recent performance improvements and price reductions of 3D printers have been remarkable. In particular, BambuLab has taken over the entry-level 3D printer market with its overwhelming printing speed and quality, displacing the Clearity Ender 3 from its position as a go-to printer for students and hobbyists.
| Ender3Pro | BambuLab |
|---|---|
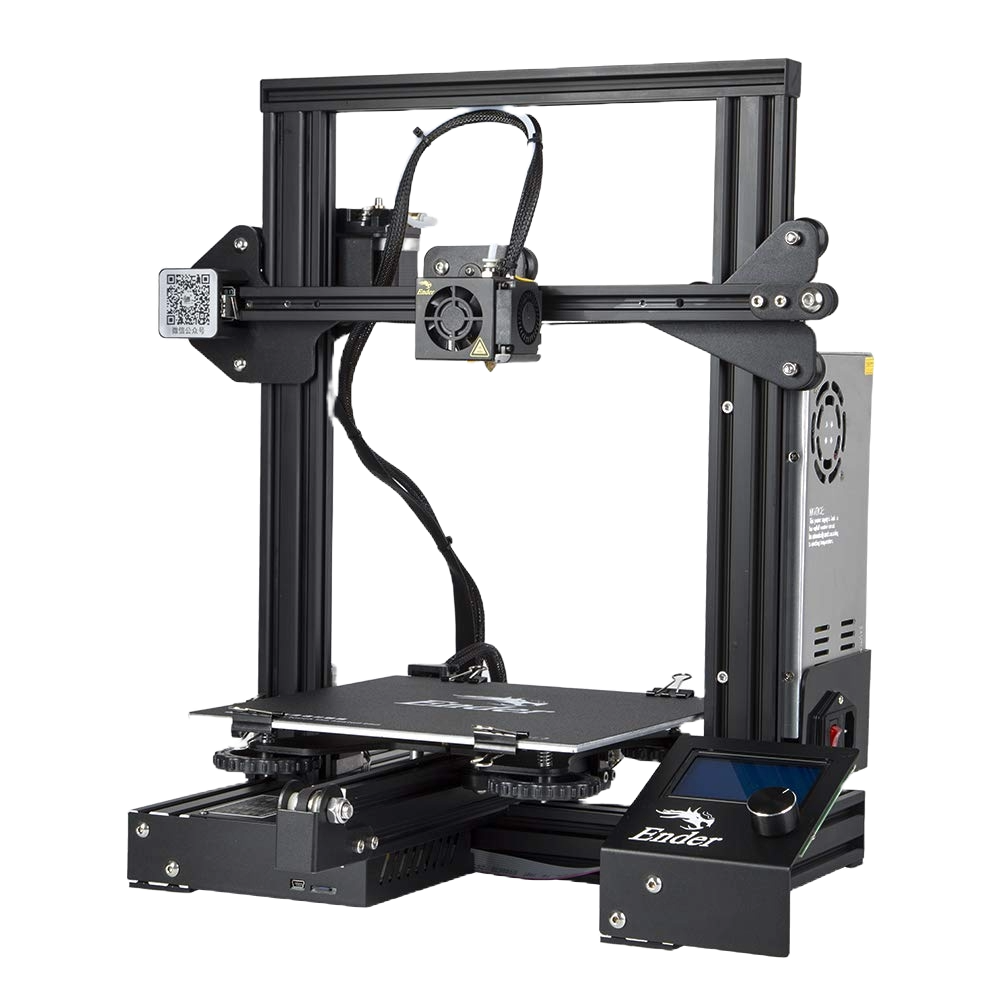 |  |
In our office, there are many Ender3Pro printers that have been left unattended due to maintenance issues with the heaters and belts.
This article explores hacks that utilize the components of 3D printers to make them useful again, using the p5.fab library developed by Blair Subbaraman.
While p5.js is typically used to draw graphics on the screen, with p5.fab, you can use the filament of a 3D printer to draw in the air, creating 3D objects in actual space.
The content presented in this article is for use outside the manufacturer’s specified usage. These actions are performed at your own risk, and the author is not responsible for any damages (including physical damage such as damage to the body, burns, or fires, etc., but not limited to these) resulting from the content of this article. Please ensure safety and comply with relevant laws and regulations before performing.
3D Printer Structure and G-code
3D Printer Structure
First, let’s take a look at the basic components of a 3D printer.
| Device Type | Components |
|---|---|
| Movement Device | - XYZ axis movement mechanism - Filament extrusion device - 0 point detection switch for each axis |
| Temperature Control | - Heater for filament extrusion device - Cooling fan for filament extrusion device - Heater table |
| Controller | - Movement control - Temperature control - Filament extrusion control - Interpretation of control code |
Ender3-like 3D printers using FDM (Fused Deposition Modeling) technology have a structure where the extrusion device, which extrudes filament like a glue gun, is attached to the XYZ axis movement mechanism.
In normal operation, a 3D model created in CAD software is converted into a tool path by a slicer software, and the 3D printer follows this tool path while extruding the melted filament to output the 3D object.
G-code command
The tool path is specified in the form of “G-code”, which is a command language that can specify the movement, extrusion amount, and temperature of the printer in detail.
For example,
G1 X10 Y20 Z30 E40 F50 ; Move command
This command specifies the following movement
- G: Move command
- G1: Linear movement (with filament extrusion)
- X,Y,Z: Move 10mm, 20mm, 30mm along the X, Y, Z axes
- E: Extrude filament 40mm along the E-axis
- F: Set maximum speed to 50mm/s
In fact, 3D printers share many similarities with other CNC (Computer Numerical Control) machines like milling machines and laser cutters - they are all part of the same family of computer-controlled machine tools that use multi-axis movement systems and can be programmed with G-code commands.
G-code command list
Here is a list of representative G-code commands for controlling a 3D printer. Try inputting the commands to check the operation of the 3D printer. The Ender3Pro uses the Marlin firmware specification as its G-code standard.
| Command | Description | Example |
|---|---|---|
| G0/G1 | Movement command | G1 X10 Y20 Z30 F3000 ; Move XYZ axes to specified positions G1 X10 Y20 Z30 E5 F3000 ; Move XYZ axes to specified positions while extruding filament 5mm |
| G28 | Homing (return to home position) | G28 ; Home all axes G28 X ; Home only the X axis |
| G90 | Absolute position mode | G90 ; Set absolute position mode |
| G91 | Relative position mode | G91 ; Set relative position mode |
| G92 | Set current position to specified value | G92 X0 Y0 Z0 ; Set current position to origin |
| M104 | Set nozzle temperature | M104 S200 ; Set nozzle temperature to 200 degrees |
| M140 | Set bed temperature | M140 S60 ; Set bed temperature to 60 degrees |
| M106 | Fan control | M106 S255 ; Rotate fan at maximum speed (S0-255) |
| M107 | Stop fan | M107 ; Stop fan |
| M84 | Turn off motor power | M84 ; Turn off all motor power |
If you are using a model that cannot be directly controlled by a USB port like BambuLab, you can output the G-code as a file and load it into the 3D printer to control the 3D printer.
Directly controlling a 3D printer with G-code
👈️Let’s try it👉️
Let’s try operating a 3D printer (using an Ender3Pro) from a serial terminal, as a check of the communication with the printer to your PC.
- Connect the 3D printer and PC using a USB cable
- Open WebSerial Terminal: https://webserial.io/
- Set the baud rate to 115200 and the line ending to new line
- Press the “select serial port” button to select the port number of the 3D printer
- On macOS, it is
/dev/cu.usbmodem1****** - On Windows, it is
COM*(check with Device Manager)
- On macOS, it is
- After selecting the port number, press the “connect” button to connect
- Input
G28to check if the 3D printer returns to the home position - Input the following commands to check the operation of the 3D printer
 G28 ; Return to home position
 G1 X100 Y100 Z50 F3000 ; Move to the center
 M104 S200 ; Heat the nozzle to 200 degrees
 M140 S60 ; Heat the bed to 60 degrees
 G1 E50 F100 ; Extrude filament 50mm
 M104 S0 ; Stop heating the nozzle
 M140 S0 ; Stop heating the bed
 M84 ; Turn off the motors
Controlling 3D printer with p5.fab
Now that we have confirmed that we can control the 3D printer directly from the serial terminal using G-code, let’s try controlling the 3D printer from p5.js.
Setting Up p5.fab
The p5.fab code can be downloaded from here. Alternatively, you can try p5.fab using the online editor or online editor to try p5.fab.
If you are using editor.p5js.org/, add the following code to index.html.
 <script src="https://unpkg.com/p5-webserial@0.1.1/build/p5.webserial.js"></script>
 <script src="https://machineagency.github.io/p5.fab/lib/p5.fab.js"></script>
 <!-- Updated version by the author
  <script src="https://nkymut.github.io/p5.fab/lib/p5.fab.js"></script>
  -->
p5.fab template
Here is the basic template for using p5.fab.
p5.fab template
let fab;

function setup() {
  createCanvas(windowWidth, windowHeight, WEBGL);
  fab = createFab();

  let connectButton = createButton("connect");
  connectButton.position(20, 20);
  connectButton.mousePressed(function () {
    fab.serial.requestPort(); // Display the serial port selection dialog and connect
    //fab.connectPrinter(); // Connect to the selected serial port
  });

  let printButton = createButton("print");
  printButton.position(20, 60);
  printButton.mousePressed(function () {
    fab.print(); // Start streaming the commands to printer
  });

  let stopButton = createButton("stop");
  stopButton.position(20, 100);
  stopButton.mousePressed(function () {
    fab.stopPrint(); // Stop streaming the commands to printer.
  });

  let exportButton = createButton("export");
  exportButton.position(20, 140);
  exportButton.mousePressed(function () {
    fab.exportG-code(); // Export G-code to a file.
  });
}

function fabDraw() {
  // Write the printing process here
}
function draw() {
  orbitControl(2, 2, 0.1);
  background(255);
  fab.render(); // Draw the tool path of the 3D printer
}
https://editor.p5js.org/didny/sketches/vPwDpre81
Communication with 3D printer
The communication process between p5.fab and the 3D printer consists of the following steps:
-
Create an instance of p5.fab with
createFab() -
Select and connect the serial port with
fab.serial.requestPort()
- In the author’s updated version,
fab.connectPrinter()is used instead offab.serial.requestPort().
-
fab.print()sends the commands infabDraw()to the 3D printer -
fab.stopPrint()stops sending the commands infabDraw()
In the author’s updated version, you can use fab.exportG-code() to export the commands in fabDraw() as a G-code file for 3D printers like BambuLab that cannot be controlled directly via USB port.
Drawing shapes with p5.fab
Now, let’s try drawing some simple shapes. The following table summarizes the main functions and their corresponding G-code commands. Each function internally adds the corresponding G-code commands to a list that will be sent to the printer.
Key p5.fab Functions
| Function | Description | G-code |
|---|---|---|
| fab = createFab(); | Create a p5.fab instance | - |
| fab.autoHome(); | Home all axes (return to origin) | G28 ; Move all axes to home position |
| fab.setTemps(205, 60); | Set nozzle temp to 205° and bed temp to 60° | M104 S205 ; Set nozzle temp to 205° M140 S60 ; Set bed temp to 60° |
| fab.moveRetract(x, y, z); | Move to position (x,y,z) without extruding | G0 X{x} Y{y} Z{z} ; Move to specified position |
| fab.moveExtrude(x, y, z, amount, speed); | Move while extruding filament | G1 X{x} Y{y} Z{z} E{amount} F{speed} ; Move while extruding |
| fab.introLine(); | Draw test line on left side of print bed | G1 X0 Y0 Z0 E5 F100 ; Move to origin while extruding 5mm |
| fab.presentPart(); | Move print to position for easy removal | |
| fab.setAbsolutePosition(); | Set all axes (X/Y/Z/extruder) to absolute mode | G90 ; Set to absolute positioning |
| fab.setERelative(); | Set extruder only to relative mode | M83 ; Set extruder to relative mode |
| fab.finishPrint(); | End print (stop heaters/fans, disable motors) | M104 S0 ; Stop nozzle heating M140 S0 ; Stop bed heating M107 ; Stop fan M84 ; Disable motors |
Drawing a cylinder
As a starting point for parametric modeling with p5.fab, let’s draw a cylinder.
p5.fab Cylinder Sample
function setup() {
  // Create a canvas and enable 3D display in WEBGL mode
  createCanvas(windowWidth, windowHeight, WEBGL);
  // Create a p5.fab object
  fab = createFab();
}

function fabDraw() {
  // Initialize the printer
  fab.setAbsolutePosition(); // Set all axes (X/Y/Z/extruder) to absolute position mode
  fab.setERelative(); // Set the extruder to relative position mode
  fab.autoHome(); // Move the printer to the home position
  fab.setTemps(205, 60); // Set the nozzle temperature to 205℃ and the bed temperature to 60℃ (use a temperature appropriate for the filament)
  fab.introLine(); // Draw a test line on the left side of the print bed

  // Set the parameters for the cylinder
  let r = 25;              // Radius of the cylinder
  let layerHeight = 0.2;   // Layer height
  let h = 20;              // Height of the cylinder

  // Get the center coordinates of the print bed
  let center = new p5.Vector(fab.centerX, fab.centerY);

  // Loop through each layer
  for (let z = layerHeight; z < h; z += layerHeight) {
    // Loop through the circumference of the layer (200 divisions)
    for (let t = 0; t <= TWO_PI; t += TWO_PI / 200) {
      if (z == layerHeight && t == 0) {
        // Move to the starting point of the first layer without extruding filament
        fab.moveRetract(r * cos(t) + center.x, r * sin(t) + center.y, z);
      } else {
        // Move along the circumference while extruding filament
        fab.moveExtrude(
          r * cos(t) + center.x,  // X coordinate: distance from center × cos(angle)
          r * sin(t) + center.y,  // Y coordinate: distance from center × sin(angle)
          z                       // Z coordinate: current layer height
        );
      }
    }
  }

  // End of printing process
  fab.presentPart();   // Move the completed part to an easy-to-remove position
  fab.finishPrint();   // End the print (turn off heater and fan, turn off motor)
}

function draw() {
  // Update the preview display
  background(255);     // Set the background to white
  fab.render();        // Draw the 3D preview of the FAB object
}
https://editor.p5js.org/didny/sketches/GrdPo8kjF
Output of Cylinder
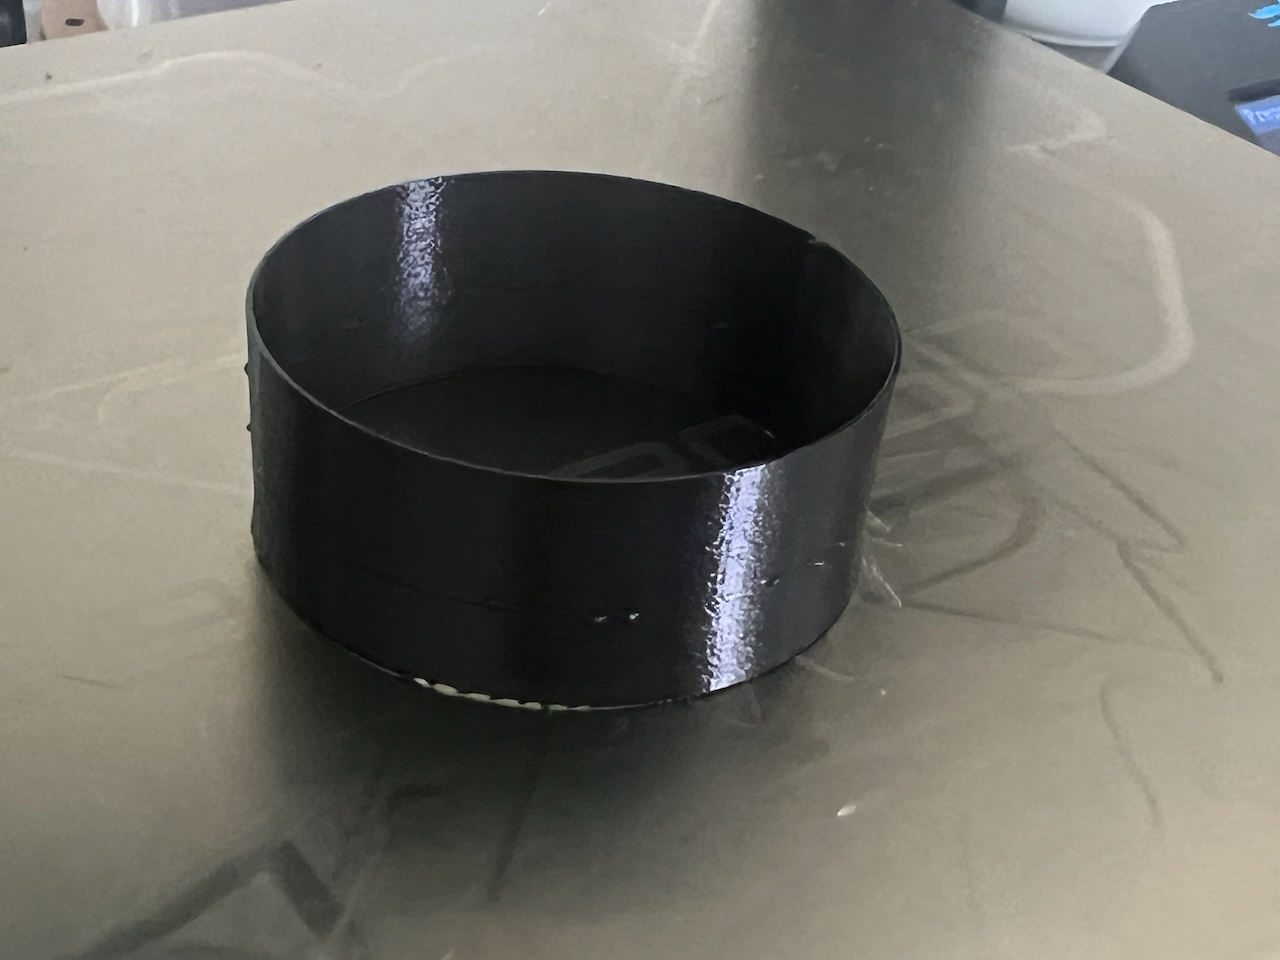 |
This way, you can control the 3D printer’s operation in a straightforward manner using JavaScript code.
“Une-Une” Wavy Tube
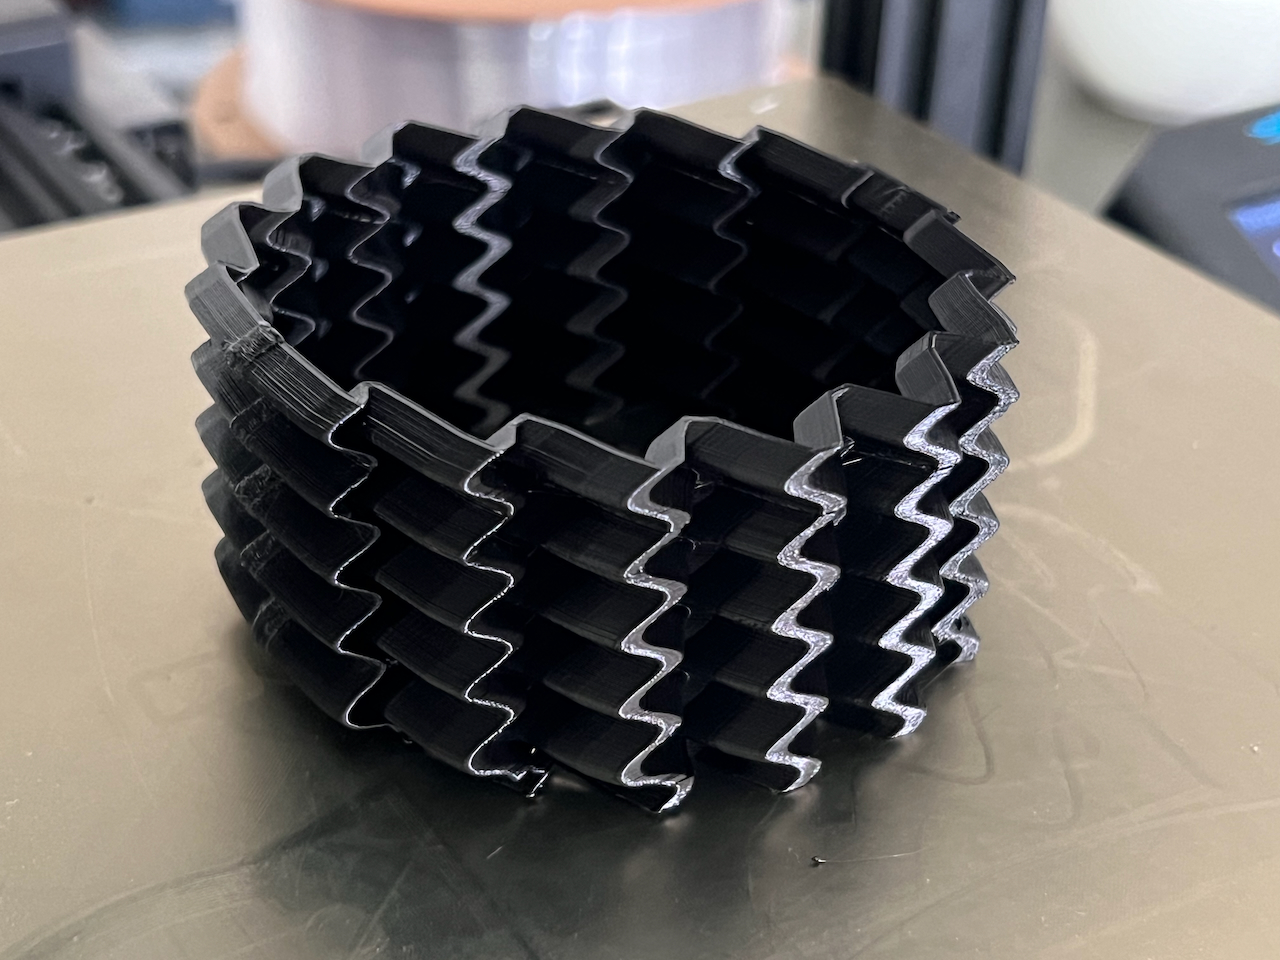
A simple cylinder is a bit boring, so let’s create a wavy tube by modulating the filament extrusion movement with sine waves to create an undulating pattern.
p5.fab Une-Une Wavy Tube
function fabDraw() {
  // Printer initialization
  fab.setAbsolutePosition(); // Set all axes (X/Y/Z/extruder) to absolute position mode
  fab.setERelative(); // Set extruder to relative position mode
  fab.autoHome(); // Move printer to home position
  fab.setTemps(205, 60); // Set nozzle temperature to 205°C and bed temperature to 60°C (use appropriate temperature for your filament)
  fab.introLine(); // Draw a test line on the left side of the print bed

  // Tube parameters
  let r = 35;              // Base radius of the tube
  let layerHeight = 0.2;   // Layer height
  let h = 20;              // Total height of the tube
  let s = 25;              // Unused parameter
  let a = 5;               // Amplitude of sine wave
  let f = 8;               // Frequency of sine wave
  let center = new p5.Vector(fab.centerX, fab.centerY); // Center coordinates of print bed

  // Loop through layers
  for (let z = layerHeight; z < h; z += layerHeight) {
    // Calculate X-axis amplitude (varies with height)
    let ampX = a / 2 * sin(z * f / 10);

    // Loop through circumference of layer
    for (let t = 0; t <= TWO_PI; t += TWO_PI / 200) {
      if (z == layerHeight && t == 0) {
        // Move to starting point of first layer without extruding
        fab.moveRetract(r * cos(t) + center.x, r * sin(t) + center.y, z);
      } else {
        // Calculate Y-axis amplitude (varies with angle)
        let ampY = a * sin(t * f * 2);

        // Move to next point while extruding filament
        fab.moveExtrude(
          r * cos(t) + ampX + center.x,  // X coordinate: base circle + sine wave modulation
          r * sin(t) + ampY + center.y,  // Y coordinate: base circle + sine wave modulation
          z                              // Z coordinate: current layer height
        );
      }
    }
  }

  // End print process
  fab.presentPart();   // Move completed part to visible position
  fab.finishPrint();   // End the print
}
https://editor.p5js.org/didny/sketches/_q68M_pdK
 | 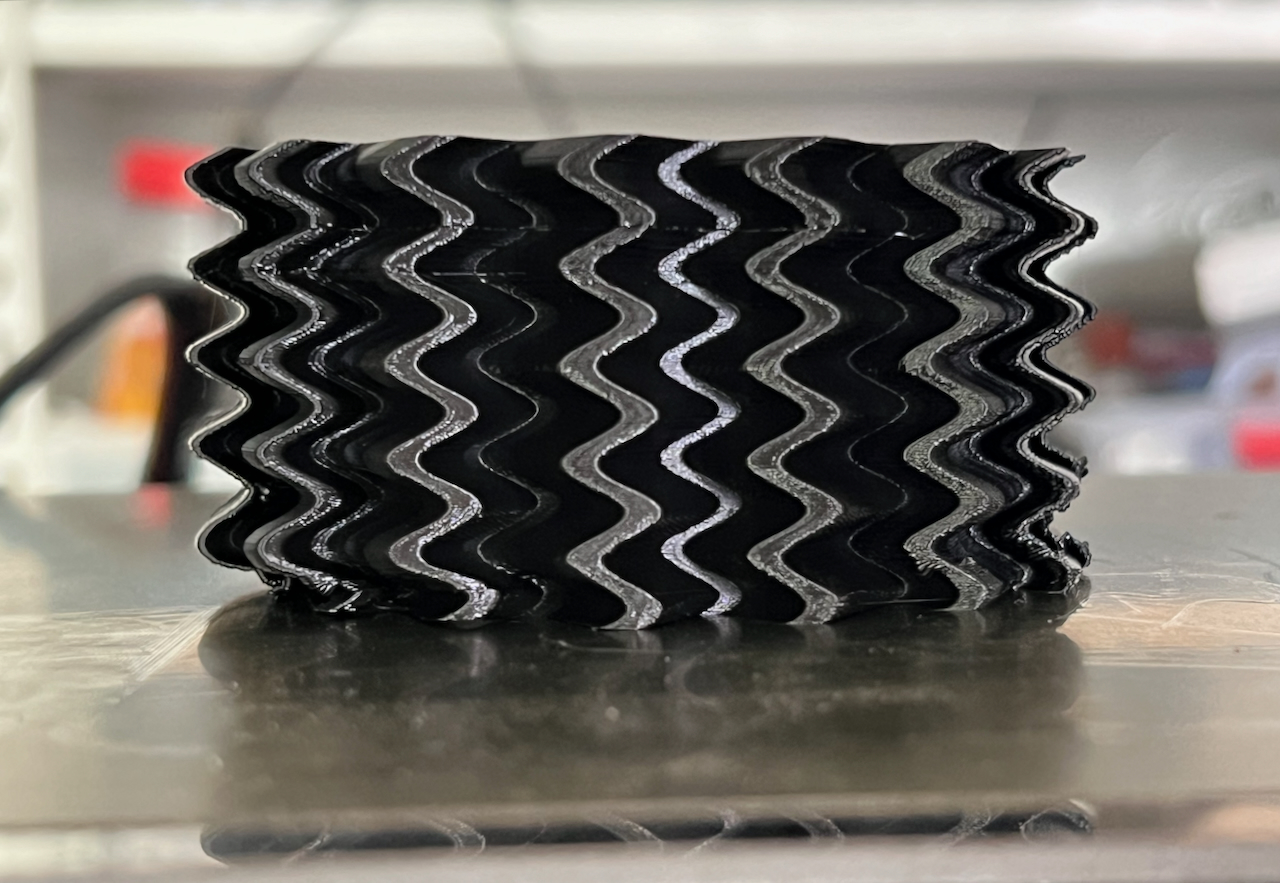 |
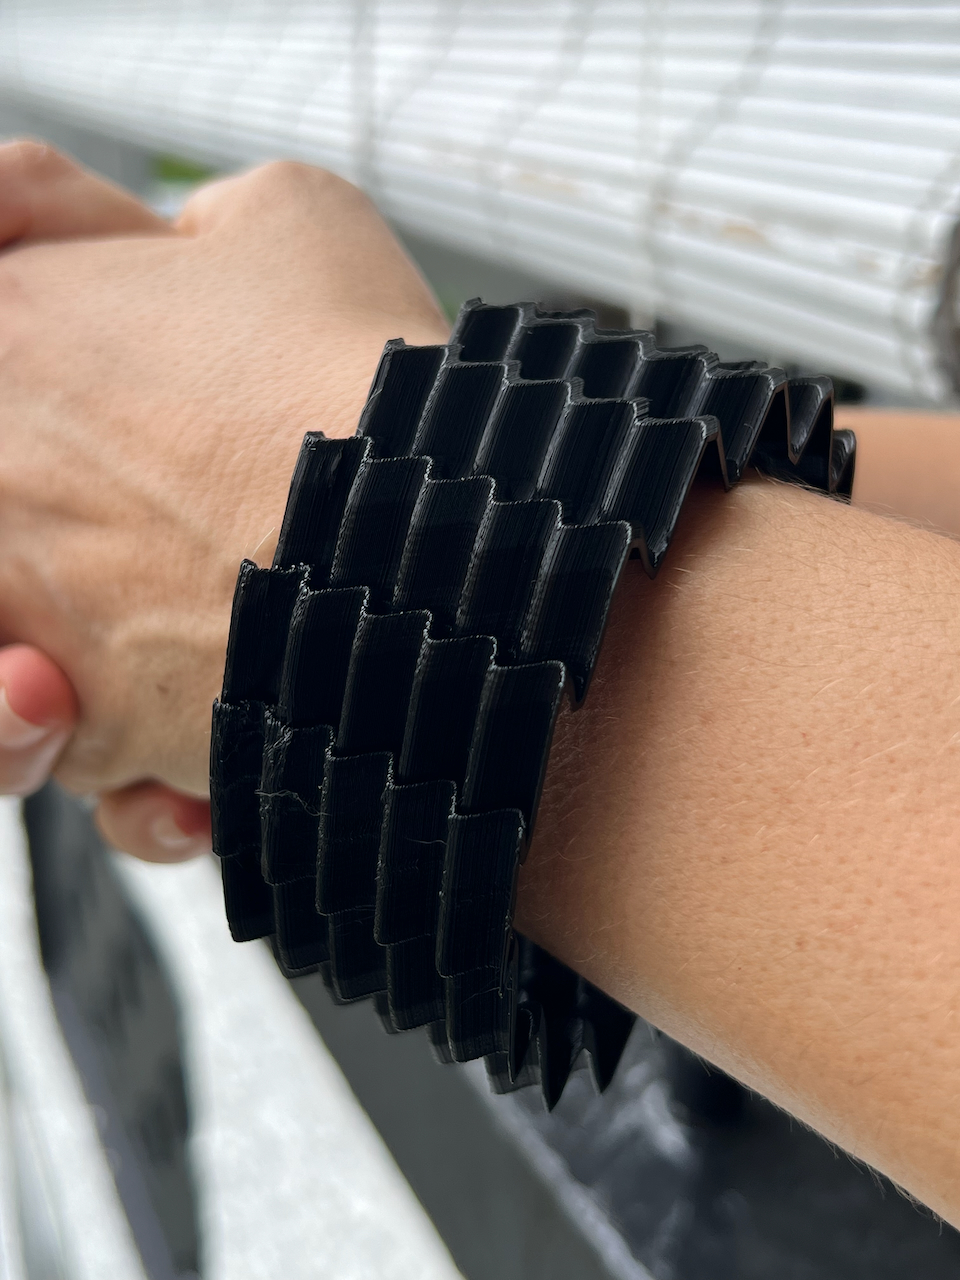
A bracelet with an undulating shape characteristic of computer-generated design has been completed.
While such shapes can be created using 3D modeling software like Rhinoceros+Grasshopper or OpenSCAD, p5.fab offers significant advantages.
With p5.fab, there’s no need to output to a 3D mesh model and convert it using slicer software. Instead, you can directly control the filament extrusion process of the 3D printer through programming, enabling what could be called “filament-perfect” fabrication (analogous to pixel-perfect), in a more intuitive way.
Summary
In this article, we introduced how to control 3D printers using p5.fab.
With p5.fab, you can:
- Program low-level printer operations sequentially
- Achieve filament-perfect fabrication
- Use individual printer components in creative ways
Due to time constraints, we couldn’t cover some interesting possibilities like:
- Using it with a camera as a 3D rig for stop-motion animation
- Replacing the filament extruder with pens or brushes to create a drawing machine
and many other creative applications waiting to be explored.
Perhaps you have a 3D printer gathering dust somewhere in your storage?
“The print quality isn’t good enough to make what I want…” “3D modeling software was too difficult to learn…”
If you’ve abandoned your 3D printer for reasons like these, p5.fab opens up new possibilities.
With p5.fab’s simple programming approach and intuitive fabrication control, you can use your 3D printer more casually and creatively than ever before.
Why not breathe new life into your dormant 3D printer with p5.fab?
And with that, have a great end of the year!
References
- p5.fab
- p5.fab Documentation
- Subbaraman, B., & Peek, N. (2022). p5.fab: Direct Control of Digital Fabrication Machines from a Creative Coding Environment. In Proceedings of the 2022 ACM Designing Interactive Systems Conference (pp. 1148-1161). ACM. https://doi.org/10.1145/3532106.3533496
- Marlin G-code Documentation