Week 2: p5.js workshop
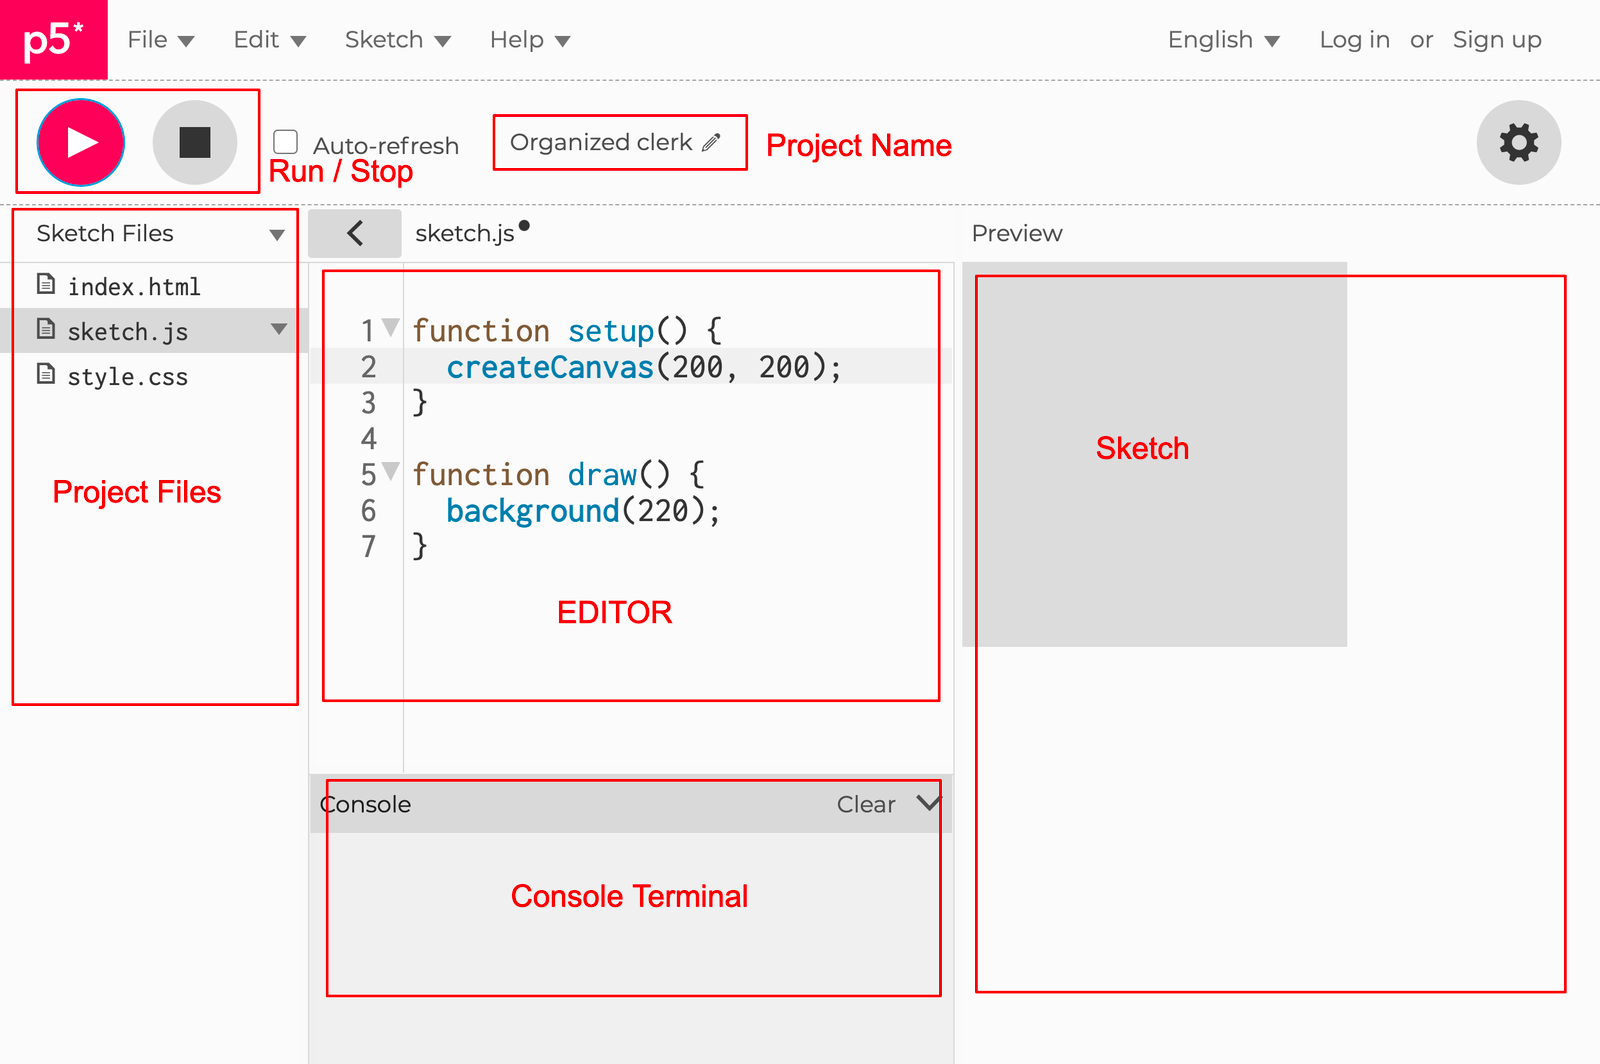
0: p5.js editor UI
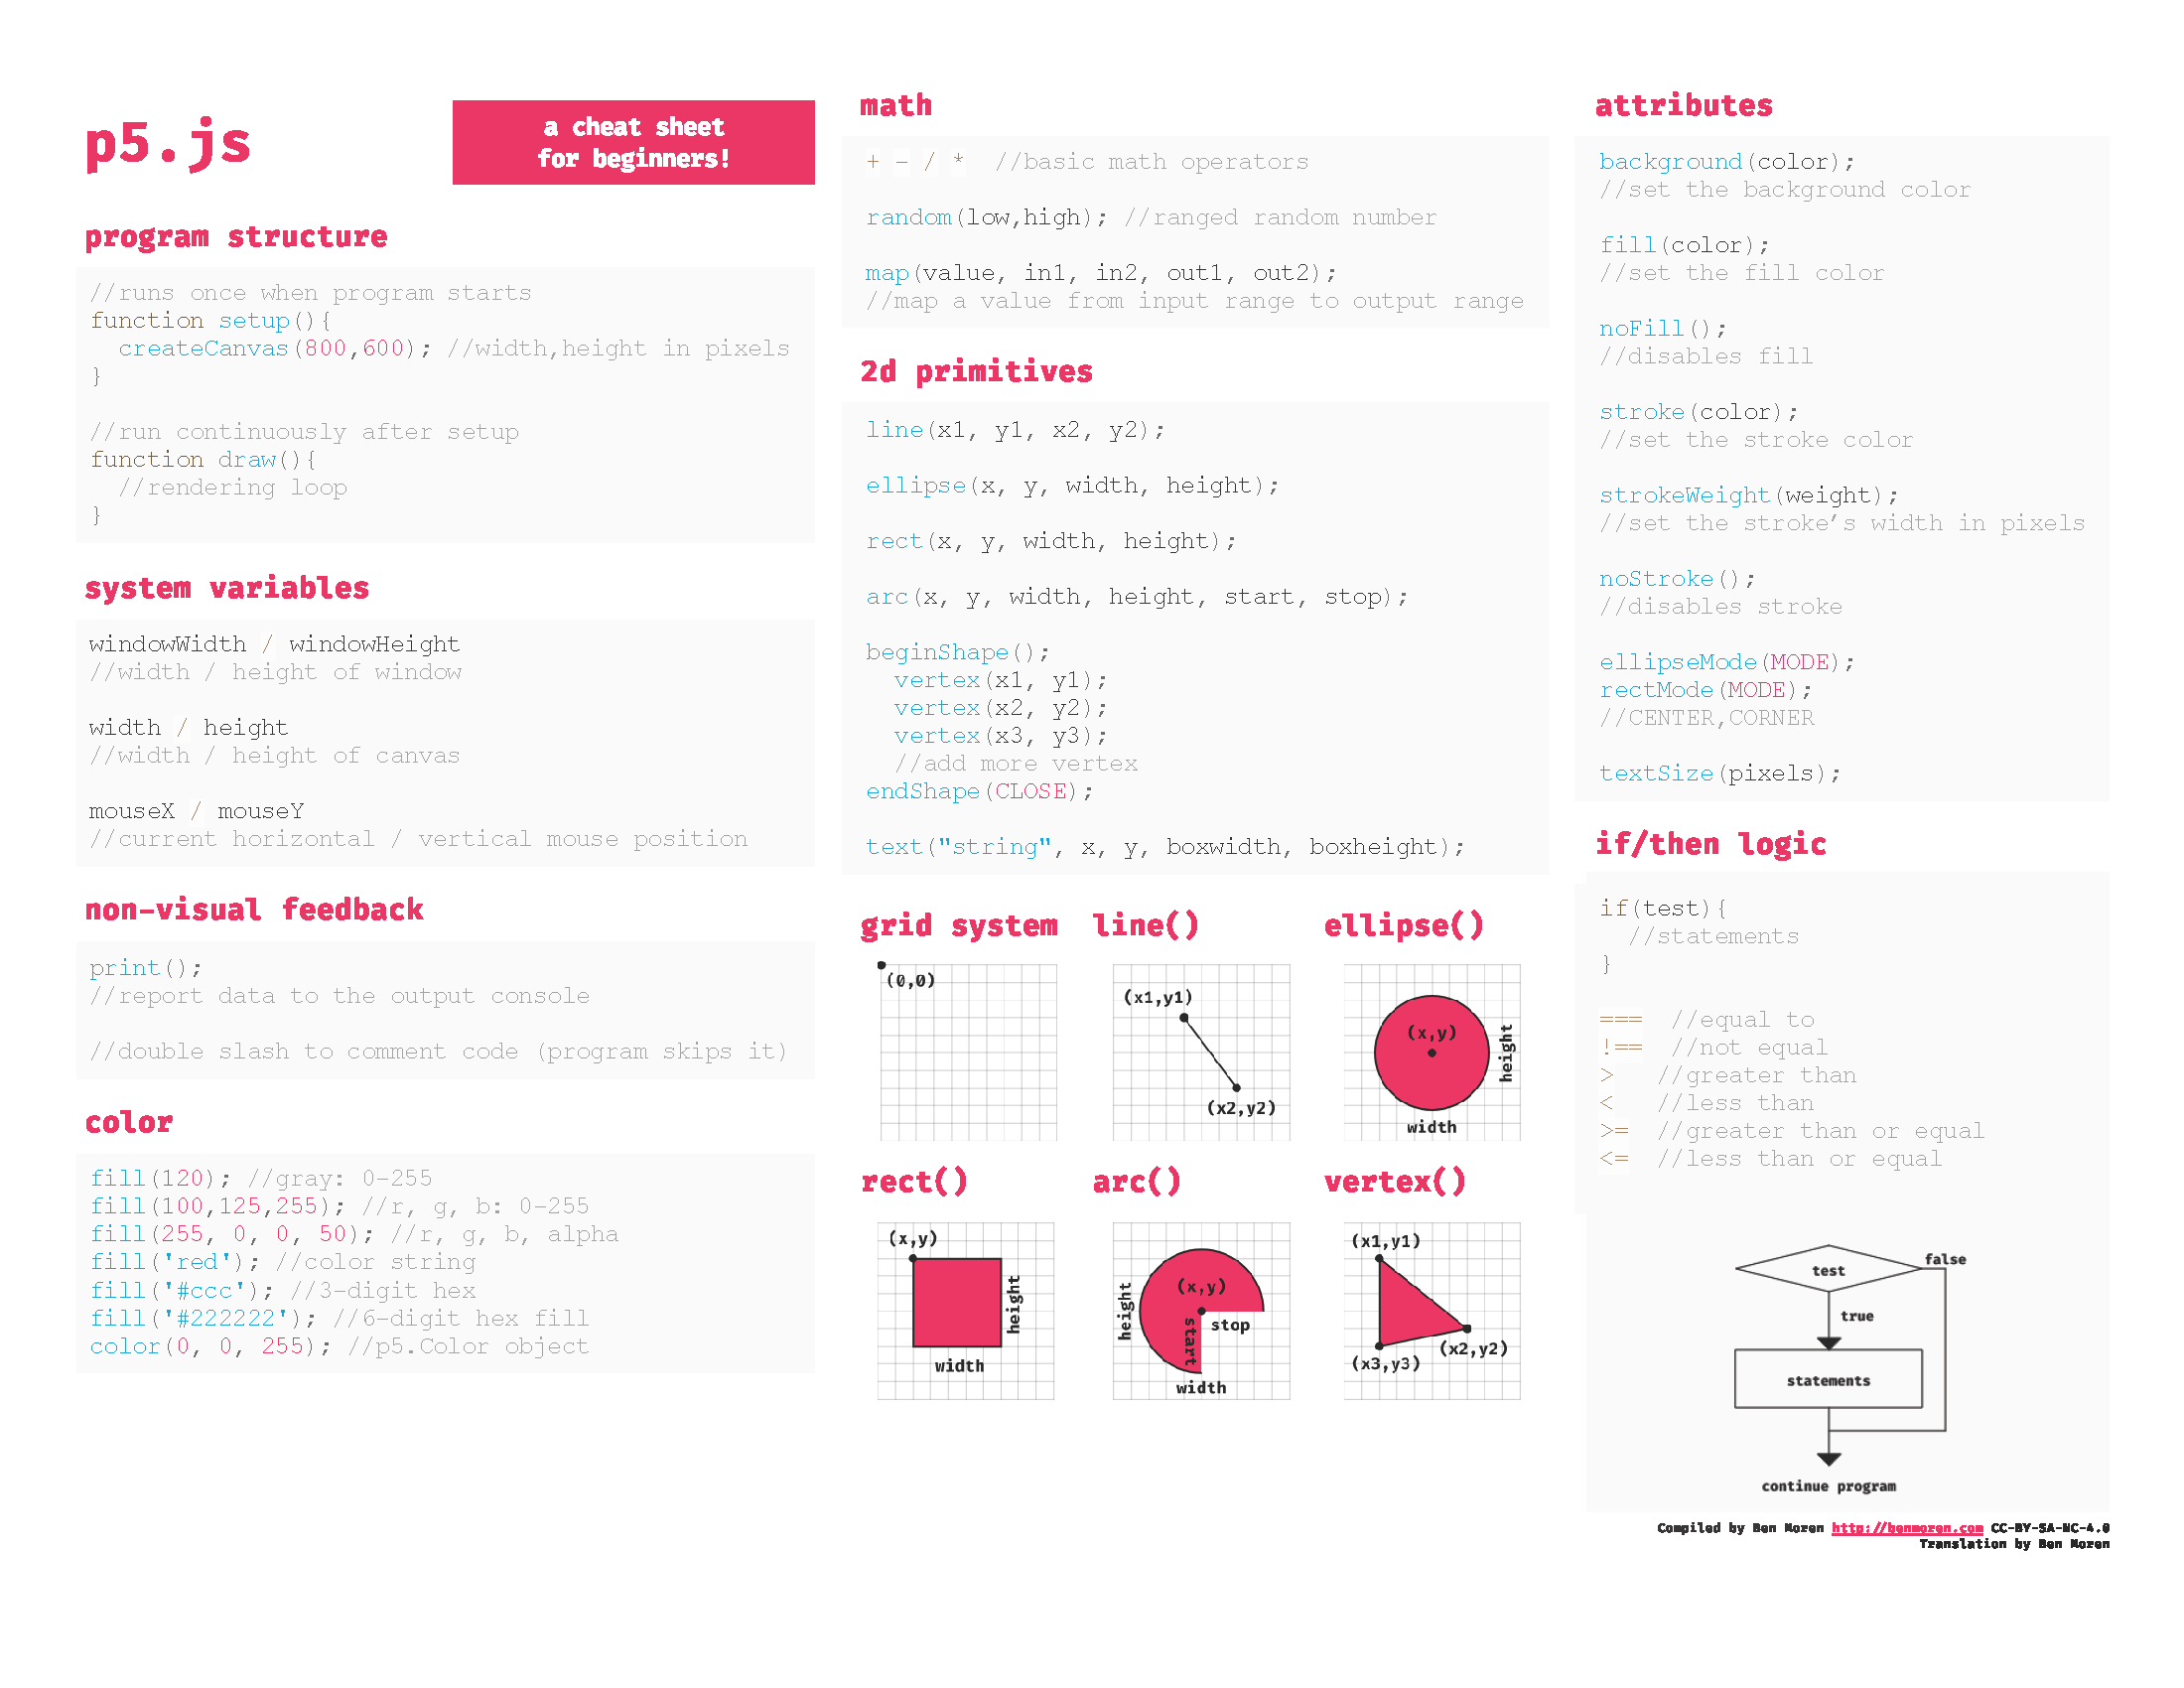
1: Basic graphics in p5.js
💡 p5.js reference page:
p5 cheatsheet
p5 playground
https://yining1023.github.io/p5PlayGround/
1.1: p5.js program structure
// global space
// e.g. define global variables, objects, functions here

function preload() {
	// Run order: 1
	// Runs once
	// Use it to load large assets, such as audio files or image files
}

function setup() {
	// Run order: 2
	// Runs once
	// Use it to set up objects, such as the drawing canvas

	createCanvas(400, 400); // this creates a 400px by 400px drawing canvas
}

function draw() {
	// Run order: 3
	// Runs continuous as a loop from top to bottom

	// Use it to control interaction logic and graphic rendering
	// while the program is running
}
1.2 Basic Drawing Functions
Shapes
rect(x, y, w, h)- Draw a rectangleellipse(x, y, w, h)- Draw an ellipse/circleline(x1, y1, x2, y2)- Draw a linetriangle(x1, y1, x2, y2, x3, y3)- Draw a trianglequad(x1, y1, x2, y2, x3, y3, x4, y4)- Draw a quadrilateralarc(x, y, w, h, start, stop)- Draw an arc
Colors & Styles
fill(r, g, b)- Set fill color (RGB values 0-255)stroke(r, g, b)- Set stroke colorstrokeWeight(weight)- Set stroke thicknessnoFill()- Remove fillnoStroke()- Remove stroke
Transformations
translate(x, y)- Move origin pointrotate(angle)- Rotate by angle (in radians)scale(x, y)- Scale drawingpush()- Save current drawing stylepop()- Restore previous drawing style
Text
text(str, x, y)- Draw texttextSize(size)- Set text sizetextAlign(align)- Set text alignment
1.3: Drawing things in p5.js
✒️ ### Try it out!
- Refer to the p5.js reference
- Find the section on shapes
- Drawing shapes on the canvas (by writing code in the draw() function)
- e.g.
rect(20, 30, 60, 40)- Questions to explore:
- What shapes / graphics can you draw?
- How do you position a shape?
- How do you change the color of a shape’s fill?
- How do you change the color of a shape’s stroke?
- How do you remove stroke / fill?
2: Draw a face that changes expression based on a variable
2.1: Let’s draw a face
👉 Example
function setup() {
  createCanvas(400, 400);
}

function draw() {
  background(255);

  // happy face
  fill(255, 255, 0);
  strokeWeight(15);
  stroke(0);
  circle(200, 200, 200);
  line(170, 170, 170, 190);
  line(230, 170, 230, 190);
  arc(200, 220, 60, 60, 0, PI);
}
👉 Result:
2.2: Draw different expressions. Control these expressions with a variable.
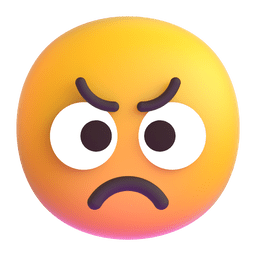
| Mood Range | mood < 30 |
30 ≤ mood < 70 |
70 ≤ mood |
|---|---|---|---|
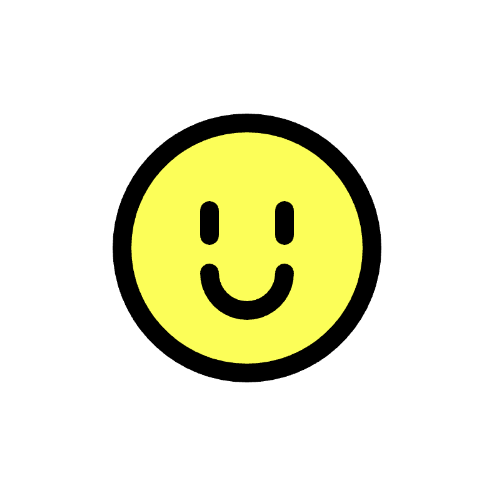
| Image | 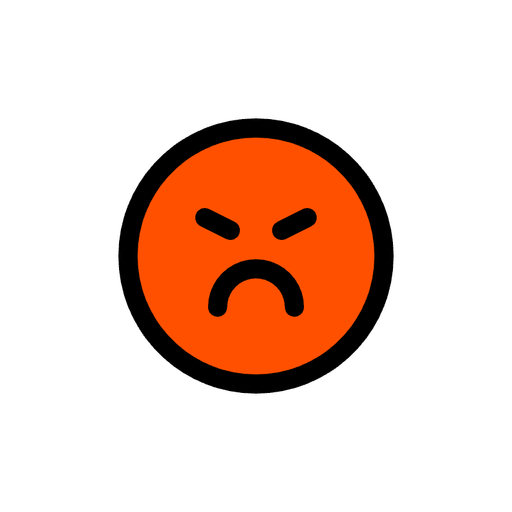 |
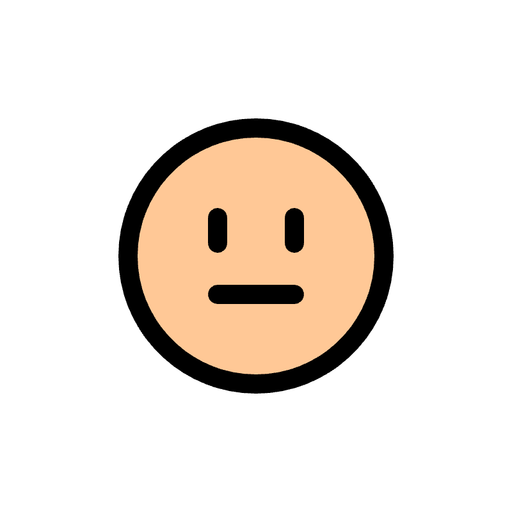 |
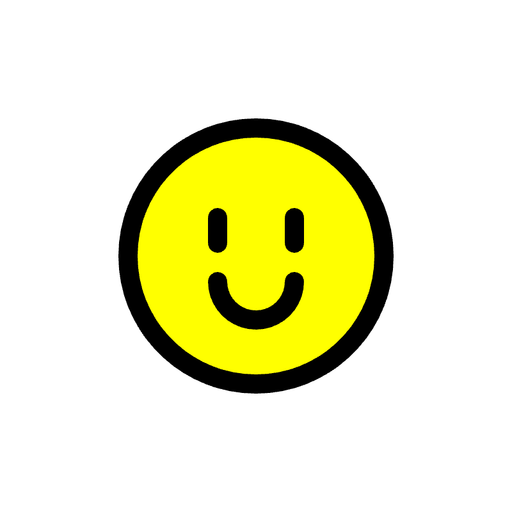 |
Example Code
```jsx

var mood = 0;

function setup() {
  createCanvas(400, 400);
}

function draw() {
  background(255);

  if (mood < 30) {
    drawAngryFace();
  } else if (mood < 70) {
    drawNeutralFace();
  } else {
    drawHappyFace();
  }
}

function drawHappyFace() {
  fill(255, 255, 0);
  strokeWeight(15);
  stroke(0);
  circle(200, 200, 200);
  line(170, 170, 170, 190);
  line(230, 170, 230, 190);
  arc(200, 220, 60, 60, 0, PI);
}

function drawNeutralFace() {
  fill(255, 200, 150);
  strokeWeight(15);
  stroke(0);
  circle(200, 200, 200);
  line(170, 170, 170, 190);
  line(230, 170, 230, 190);
  line(170, 230, 230, 230);
}

function drawAngryFace() {
  fill(255, 80, 0);
  strokeWeight(15);
  stroke(0);
  circle(200, 200, 200);
  line(160, 170, 180, 180);
  line(240, 170, 220, 180);
  arc(200, 240, 60, 60, PI, 0);
}

```
2.3: Create interaction logic for mood variable value
- Program
moodvariable value to decrease over time. - Print the value of the
moodvariable in the console panel. - Increase
moodvariable when mouse clicks.
✨ Bonus: Increase mood variable only when mouse clicks inside the face.
Example Code
```jsx

var mood = 100;

function setup() {
  createCanvas(400, 400);
}

function draw() {
  background(255);

  if (mood < 30) {
    drawAngryFace();
  } else if (mood < 70) {
    drawNeutralFace();
  } else {
    drawHappyFace();
  }

  mood = mood - 0.2;

  if (mood < 0) {
    mood = 0;
  }

  print(mood);
}

function mousePressed() {

  print("clicked");
  mood = mood + 5;

  if (mood > 100) {
    mood = 100;
  }

  // BONUS

  //   if (dist(mouseX, mouseY, 200, 200) < 100) {
  //     print("clicked");
  //     mood = mood + 5;
  //     if (mood > 100) {
  //       mood  = 100;
  //     }
  //   }
}

function drawHappyFace() {
  fill(255, 255, 0);
  strokeWeight(15);
  stroke(0);
  circle(200, 200, 200);
  line(170, 170, 170, 190);
  line(230, 170, 230, 190);
  arc(200, 220, 60, 60, 0, PI);
}

function drawNeutralFace() {
  fill(255, 200, 150);
  strokeWeight(15);
  stroke(0);
  circle(200, 200, 200);
  line(170, 170, 170, 190);
  line(230, 170, 230, 190);
  line(170, 230, 230, 230);
}

function drawAngryFace() {
  fill(255, 80, 0);
  strokeWeight(15);
  stroke(0);
  circle(200, 200, 200);
  line(160, 170, 180, 180);
  line(240, 170, 220, 180);
  arc(200, 240, 60, 60, PI, 0);
}

```
2.4: Using images
| Happy Face | Neutral Face | Angry Face |
|---|---|---|
 |
 |
 |
- Create a folder in the sketch directory and upload image files into the folder.
- Load images in
preloadusingloadImage - p5.js
imagereference:- https://p5js.org/reference/#/p5/image
- Example Code
var imageHappy;

function preload() {
  imageHappy = loadImage("img/happy-face.png");
}

function setup() {
  createCanvas(400, 400);
}

function draw() {
  background(255);

  imageMode(CENTER);
  image(imageHappy, width / 2, height / 2, 200, 200);
}
2.4.1: Using an animated GIF
2.4.1: Using an animated GIF
| Animated Face |
|---|
 |
You can use the image function to draw an animated GIF as well.
-
Example Code
  var animatedFace;

  function preload() {
    animatedFace = loadImage('./assets/animated-face.gif');
  }

  function setup() {
    createCanvas(400, 400);
  }

  function draw() {
    background(255);
    image(animatedFace, 100, 100, 200, 200);
  }
3: Abstracting Graphics with Functions
-
Look at the code below. What is the relationship between all the numbers that are bolded and underlined?
They are all related to the horizontal center coordinate of the face!
function setup() {
	createCanvas(400, 400);
}

function draw() {
	background(255);
	drawHappyFace();
}

function drawHappyFace() {
  fill(255, 255, 0);
  strokeWeight(15);
  stroke(0);
  circle(200, 200, 200);
  line(170, 170, 170, 190);
  line(230, 170, 230, 190);
  arc(200, 220, 60, 60, 0, PI);
}
3.1: Variables as abstract properties
We can write functions that take inputs (”arguments”). The value of these inputs affect the function’s output.
e.g.
function drawHappyFace(x, y) {
	// This function has two arugments: x and y
	// In this case, we want to use x and y to determine the center of the face
}
Write code inside the drawHappyFace function block above such that it draws a happy face based on the value of the x and y arguments.
-
Example code
  function setup() {
  	createCanvas(400, 400);
  }

  function draw() {
  	background(255);
  	drawHappyFace(150, 150);
  }

  function drawHappyFace(x, y) {
    fill(255, 255, 0);
    strokeWeight(15);
    stroke(0);
    circle(x, y, 200);
    line(x - 30, y - 30, x - 30, y - 10);
    line(x + 30, y - 30, x + 30, y - 10);
    arc(x, y + 20, 60, 60, 0, PI);
  }
💡 Reflection:
- What other properties of this drawing can we abstract into an argument for the function?
- Why should we abstract functions in this way?
3.2: Functions that “return” an output
We can also write functions that runs through a series of instructions and returns a response.
This is achieved with the return command.
Example: returning the state of the face based on a numerical input (e.g. mood).
var mood = 100;
var state = returnState(mood);

function returnState(value) {
	if (value < 30) {
		return "ANGRY";
	} else if (value < 70) {
		return "NEUTRAL";
	} else {
		return "HAPPY";
	}
}